These instructions help you with logging in, adding material to the screens you have the right to and changing file’s settings.
1. Login
Login to the system at:
Enter your email address and the password you created. Press “Log in”.
2. List of Screens
You should be able to see the Screens that you have access in the list on the right.
If the Screens list is empty and you are the admin of your organization, you can easily connect the screens via the “local admin” button (only visible for users with the local admin status).
Note: If you are NOT the admin of your organization, contact the admin and ask to add the screens you need to your account.
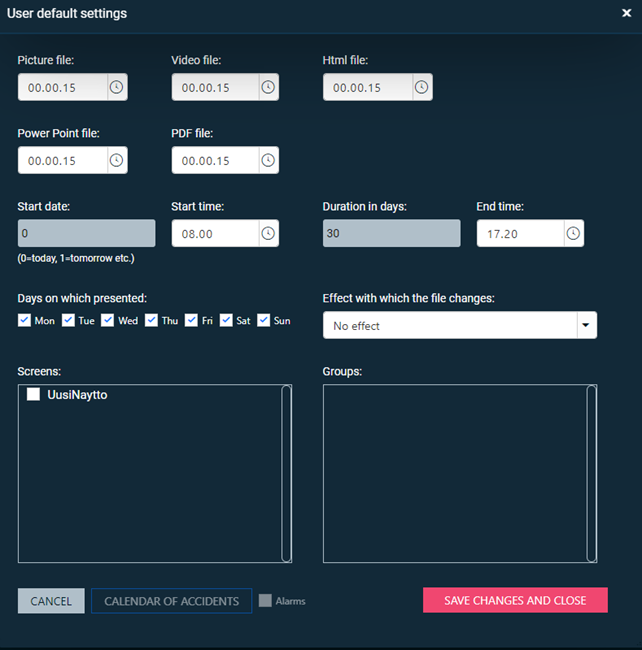
3. User default settings
Press the “User default settings” button. The system supports 49 different file formats. They are sorted into five main groups (Picture 3).
When you add, for example, a .jpg file, it will have a presentation time of 15 seconds by default.
Start Date = 0 means that the presentation starts today and lasts 30 days (= Duration in days)
Start time and End time tells the daily presentation time. That is, the file is presented during its validity period every day between 9:00 a.m. and 5:20 p.m.
If you don’t want files to be shown on e.g. weekends, deselect Sat and Sun.
In the Screens section, you should select at least one screen where you want the presentation to go.
When you have made your selections, press “Save changes and close”.
NOTE: you can change the default settings whenever you want and the changes will only affect the next files you add.
You can change the settings of an individual file by clicking on the file name under files in the main view.
4. Add Material
Now you are ready to add the first files to the list.
(Tip: You should add only one file first, preferably a image and a www page.)
Adding a file:
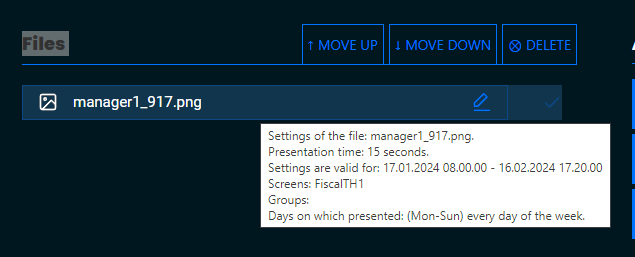
Press “Upload Files” button and select file. In the picture 4 is selected the “manager1” file from a computer.
Press “open” button.
After that you can see selected picture in Files list.
If you move cursor of the mouse on the picture name, you can see settings of the picture.
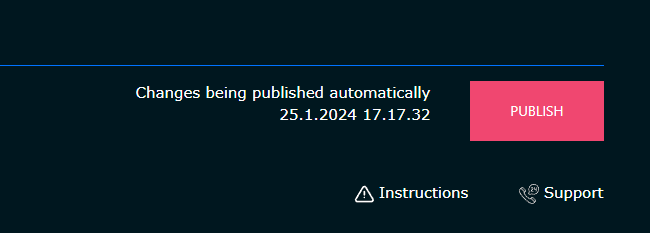
Finally press Publish-button to publish the changes. (The button will go from red to green.)
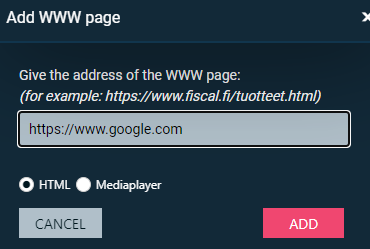
Adding www-site:
Press Add WWW-button
Write URL of the WWW-site (in the Picture it is: https://www.google.com) and press ADD-button.
You should see selected WWW-site name in the Files list.
Finally press Publish-button to publish the changes. (The button will go from red to green.)
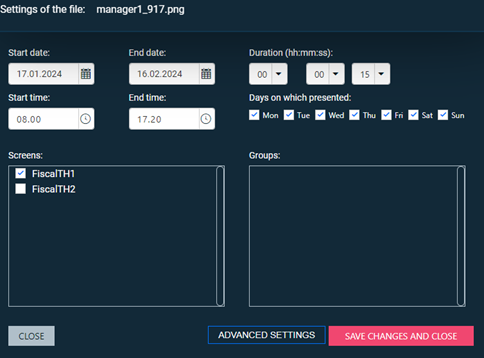
5. Change file’s settings
Click name of the file and settings of the file will open.
You can change:
– Start and end date. – Start and end time (note that the time is a 24-hour time! That is, the file is shown on each show day for the time between the start and end time) – Duration (how long the file is presented at a time when it is its turn to be presented) – The days of the week when the file is being presented – Screens where you want this file to appear
If you made changes, press “save changes and close” otherwise press “close”.
Finally press Publish-button to publish the changes. (The button will go from red to green.)
After few minutes, you should see the files you just added on the screen(s) you targeted it.
In the Screens list, you see when all is OK and more information if you move the cursor of the mouse on the screen name, you can see settings of the screen.
If you click on the screen name, you will see a list of the files that should be displayed on the screen right now.
You can also see a live image on the screen, this takes a few moments to start.
If you still have questions after reading the instructions, you can submit a support ticket from the front page.